

Table of Contents
- Why Generous Sizing Matters in Outdoor Apparel
- How to Measure Chest for a Shirt Accurately
- Measuring Waist, Sleeve Length, and Shoulder Width
- Reading and Comparing Outdoor Shirt Size Charts
- Hiking Shirt Fit for Layering: Testing Movement and Comfort
- Identifying Relaxed Fit Hiking Shirts and Generous Cuts
- Fabric Behavior and Shrinkage: What to Expect After Washing
- Frequently Asked Questions
Last Updated: October 7, 2026
Why Generous Sizing Matters in Outdoor Apparel
Generous sizing outdoor shirts are about function, not just comfort. Tight fabric restricts movement and pulls at seams when you layer, move through brush, or reach overhead.
Many outdoor enthusiasts buy their usual size and regret it within the first hike. The problem isn't always the brand, outdoor apparel sizing varies dramatically across manufacturers.
This guide shows you how to measure accurately, read size charts the right way, and test for real movement and layering capacity before you buy.
How to Measure Chest for a Shirt Accurately
Gathering Your Tools
You need only two items to measure chest circumference: a soft tape measure and a mirror. A soft fabric tape is essential because rigid metal tapes don't conform to your body's curves. You can find one for a few dollars at any pharmacy or fabric store.
Wear the base layer you plan to wear under your outdoor shirt, a thin thermal long-sleeve, for example, or nothing if you hike bare-skinned. The fit changes based on what's underneath.
Taking the Measurement
Stand straight in front of a mirror with arms relaxed at your sides.
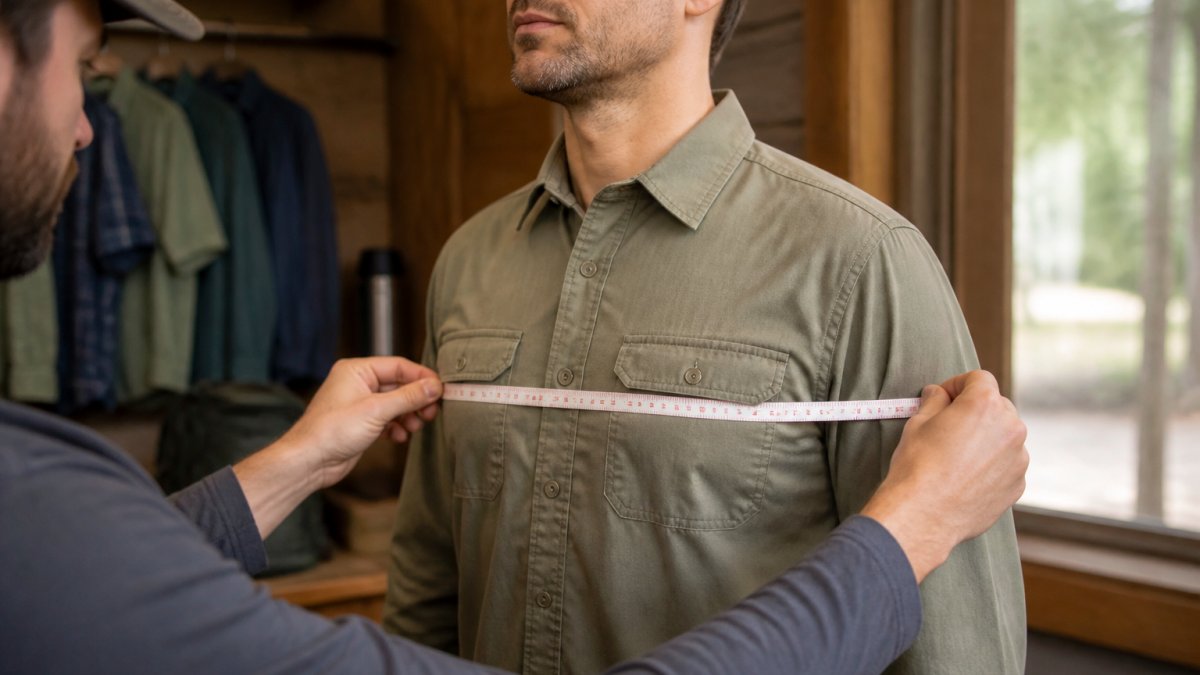
Take the reading where the tape meets itself. Write this number down. Measure twice to confirm. This is your actual chest measurement.
What most people miss: generous sizing outdoor shirts typically have 4-6 inches of ease built into the chest.
Measuring Waist, Sleeve Length, and Shoulder Width
Waist measurement matters less than chest, but it prevents awkward billowing. Measure around your natural waist with the same soft tape, horizontal and snug but not tight.
Sleeve length determines whether fabric bunches at your wrists or leaves them exposed.
Shoulder width is often overlooked but critical. Measure across the back from the outer edge of one shoulder bone to the other.
Reading and Comparing Outdoor Shirt Size Charts
Every brand's size chart is different, and the tag label is the least reliable information you have. What matters is the garment's finished measurements, the actual chest, waist, sleeve, and length numbers the manufacturer publishes. Compare those against your body measurements plus the ease you want.
Step 1: Pull the finished garment measurements, not the size label
Most outdoor brands publish two charts: a body-measurement chart (what the brand thinks your body measures) and a garment-measurement chart (what the shirt actually measures laid flat). You want the garment chart.
If no garment measurements are published, ask customer service for the chest width (pit-to-pit), body length, and sleeve length for your size. Most outdoor brands provide these on request.
Step 2: Build a comparison worksheet
Open a spreadsheet or a sheet of paper and create these columns:
| Column | What goes in it |
|---|---|
| Your body measurement | Chest, waist, sleeve, shoulder, from your own tape measure |
| Target garment measurement | Your body measurement plus your desired ease (see below) |
| Brand A, size you're considering | Chest width, body length, sleeve length from the brand's garment chart |
| Brand B, size you're considering | Same fields |
| Brand C, size you're considering | Same fields |
| Fit verdict | Roomier than target / matches target / tighter than target |
Double the pit-to-pit chest width to get full chest circumference: a shirt listed as "22 inches pit-to-pit" has a 44-inch chest circumference. Compare that against your body chest plus ease.
Step 3: Set your ease target before you shop
Ease is the difference between the garment's chest circumference and your body chest circumference. For layering over a thermal base, 4 to 6 inches of chest ease gives comfortable room without looking oversized; for a shirt worn alone in warm weather, 2 to 3 inches is usually enough. Write your target at the top of your worksheet and hold every brand to it.
Step 4: Reconcile conflicting measurements
Brands rarely match your target on every dimension at once, a shirt may hit your chest ease target but run short in the body or tight in the sleeve. When that happens, decide which dimension matters most for your activity:
- Layering and cold-weather use: prioritize chest ease and body length. A short body length rides up when you bend or reach.
- Warm-weather hiking: prioritize sleeve length and shoulder width so the shirt doesn't bind when you swing your arms.
- Climbing or scrambling: prioritize shoulder width and sleeve length; chest ease matters less than overhead reach.
If a shirt misses your target on two or more priority dimensions, size up or move to a different brand.
Step 5: Sanity-check with fit language and reviews
Fit descriptions are a shortcut, not a substitute for numbers. "Relaxed fit" and "generous fit" usually signal 4 to 6 inches of chest ease; "standard fit" or "athletic fit" signals 2 to 3 inches; "trim fit" or "slim fit" signals 1 to 2 inches or less.
Read reviews for specific fit signals: "I sized down," "runs large in the chest," "short in the torso," "sleeves run long." Ignore generic "fits great" comments. Only reviewers who list their height, weight, and normal size are translatable to your own body.
Federal Trade Commission guidance on textile and apparel labeling
Hiking Shirt Fit for Layering: Testing Movement and Comfort
Static measurements tell you whether a shirt fits your body, not whether it works on a trail. A shirt can hit every number on your worksheet and still bind across the back when you reach for a handhold, ride up when you bend to tie a boot, or bunch under a pack strap. The only way to know is a short, repeatable movement test.
The five-move fit test
Wear the shirt over the exact base layer you plan to use, a merino long-sleeve or synthetic tee. The base layer changes the fit, so testing without it gives a false result.
Run these five moves in order and note where the shirt pulls, binds, or gaps:
- Overhead reach. Raise both arms straight up as if adjusting a pack strap or grabbing a branch. The shirt hem should stay below your waistband. If the hem lifts above your navel, the body length is too short for overhead work.
- Forward bend. Bend at the waist as if picking up a trekking pole. The back of the shirt should not pull tight across your shoulder blades. If you feel tension between your shoulder blades, the shoulder width or back length is too small.
- Torso rotation. Rotate your torso side to side as if looking behind you on a switchback. The shirt should twist with you without the fabric bunching under your arms.
- Cross-body reach. Reach your right hand toward your left hip as if accessing a hip-belt pocket. The chest and shoulder should not bind. Binding here means the chest ease is too low for layered use.
- Elbow bend. Bend both elbows to 90 degrees as if holding a map or gripping trekking poles. The sleeve should not pull at the shoulder seam or ride up past your wrist bone.
Pass/fail criteria
A shirt passes if, across all five moves, you can answer yes to these:
- The hem stays below your waistband on the overhead reach.
- No fabric pulls tight across your back on the forward bend.
- No bunching under the arms on torso rotation.
- No binding across the chest on the cross-body reach.
- The sleeve stays at or below your wrist bone on the elbow bend.
If a shirt fails two or more moves, size up or choose a different cut. If it fails only one, decide whether that move matters for your activity. A road cyclist may never need the overhead reach; a climber needs it on every pitch.
Layering sequence test
Generous sizing only pays off if the shirt layers cleanly. Test the full stack:
- Put on your base layer.
- Put on the outdoor shirt.
- Add your insulation layer (fleece, puffy, or grid fleece).
- Add your shell if you carry one.
Walk around, raise your arms, and bend forward. You should move through the full range without the shell or insulation bunching at the elbows or the shirt hem riding up under the midlayer. If the stack feels tight across the chest or shoulders, the outdoor shirt is the wrong size, not the insulation.
Why this matters more than the size label
Two shirts can both be labeled "large" and both list a 44-inch chest circumference, yet one passes the five-move test and the other fails.
Shopping online? Order two sizes when the return policy allows, run the five-move test on both, and keep the one that passes.
Identifying Relaxed Fit Hiking Shirts and Generous Cuts
Relaxed fit hiking shirts use specific design features that signal genuine generous sizing, not marketing language.
Look for shirts described as "relaxed fit" or "generous cut" that show a drop measurement, the difference between chest and waist circumference.
Examine product photos: generous outdoor shirts show visible space between fabric and the model's body.
Check shoulder seam placement in photos.
Read customer reviews for fit feedback. Outdoor enthusiasts often mention whether sizing ran generous or tight.
Fabric Behavior and Shrinkage: What to Expect After Washing
Generous sizing can shrink away if you don't wash correctly, a common source of disappointment.
Cotton and cotton-blend outdoor shirts shrink 3-5% in the first few washes with hot water and a hot dryer.
Synthetic fabrics like polyester and nylon shrink less, usually 1-2%. If generous sizing matters, choose synthetic or synthetic-blend fabrics, they maintain fit through multiple wash cycles.
Check the care tag before buying.
Wash your new outdoor shirt once before a serious hike.
Finding generous sizing in outdoor shirts requires measuring accurately, reading size charts carefully, and understanding how fabric behaves. Tortoise Trail Gifts offers outdoor apparel designed with faith-based designs and nature-inspired collections that let you express your values while staying comfortable on every adventure.
Frequently Asked Questions
How much room should you leave for layering under an outdoor shirt?
For comfortable layering, aim for 2-4 inches of ease between your body measurements and the garment measurements. This allows a base layer and mid-layer to fit without bunching. Check the size chart to confirm the garment's chest measurement is 2-4 inches larger than your actual chest measurement. Generous sizing in outdoor shirts typically provides this space naturally, making them ideal for hiking and trail activities where temperature changes require layering flexibility.
What measurements should you check when buying an outdoor shirt online?
Always check chest circumference, sleeve length, shirt length, and shoulder width from the size chart. Chest measurement is most critical for fit. Sleeve length determines if cuffs hit your wrist properly. Shirt length affects how the hem sits on your hips. Shoulder width ensures the seams align with your shoulders. Compare each measurement to a shirt that already fits well, and account for the fabric's stretch or shrinkage potential before selecting a size.
How do you tell whether an outdoor shirt has a generous fit?
Compare the garment's chest measurement to your body's chest measurement. Generous sizing typically offers 3-5 inches of extra room beyond your actual chest size. Check the size chart for terms like 'relaxed fit' or 'generous cut.' Look at the shoulder seams, they should sit at or slightly beyond your shoulder point, not tight. Read customer reviews mentioning fit; many note whether a shirt runs true-to-size or larger. Test movement by imagining how the shirt will feel when layered and moving on the trail.
Should you choose a relaxed fit or size up for an oversized outdoor shirt?
A relaxed fit shirt is specifically cut with extra room built in, so you typically wear your usual size. Sizing up adds extra inches across the chest, shoulders, and length, useful if you need significant layering room or prefer a looser silhouette. For outdoor activities, relaxed fit hiking shirts are designed for movement and layering without excess length. Size up only if the relaxed fit option doesn't provide enough ease for your layers, or if you want an intentionally oversized look.
0 comments